3D Printing Help
How to print FDM terrain support-free
A Beginner-to-confident guide to printing Iain Lovecraft terrain on your FDM printer — no supports, no mess, no wasted filament
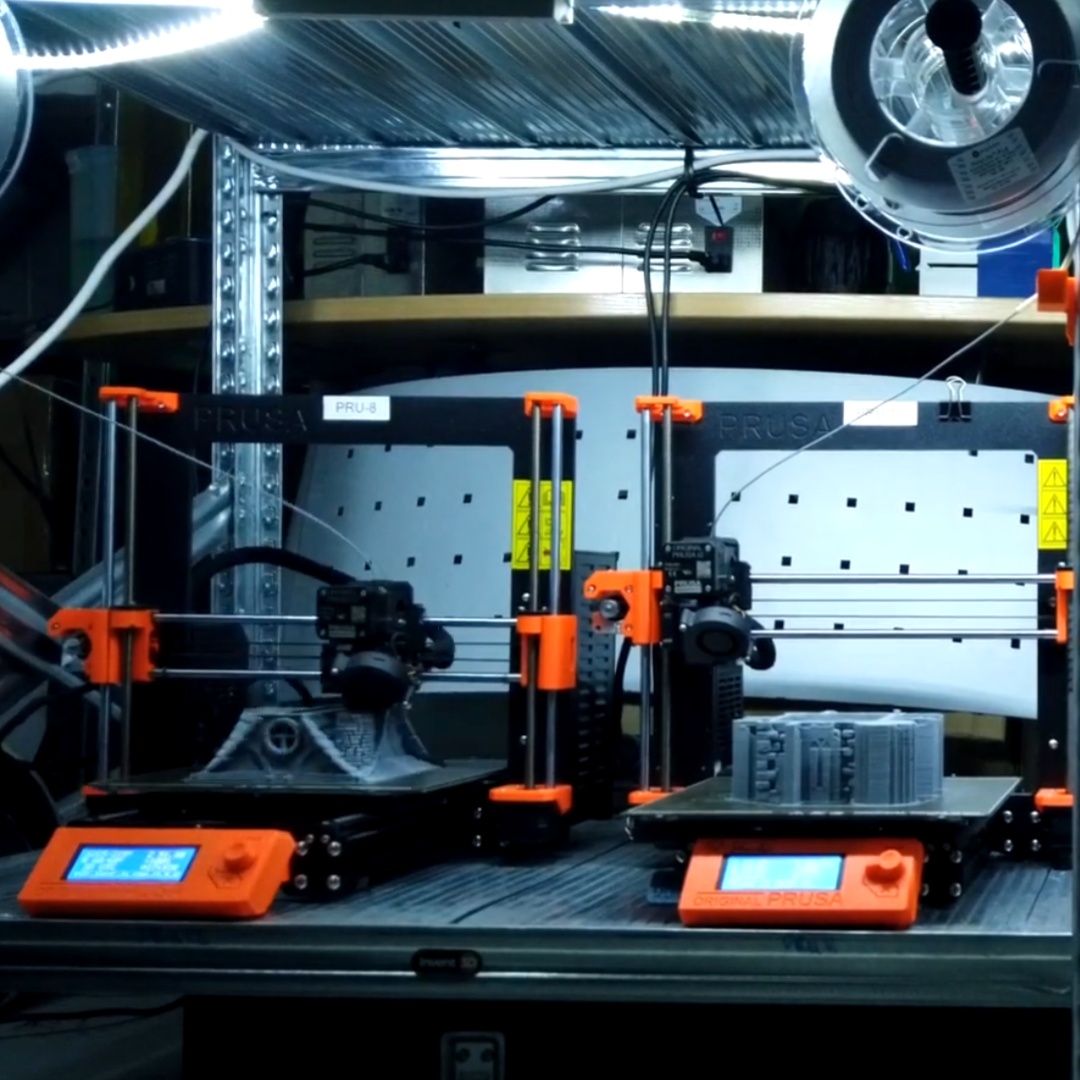
If you own an FDM printer — a Bambu Lab, Creality Ender, Prusa, or any desktop filament machine — you are sitting on the ability to produce stunning, table-ready terrain. This guide walks you through everything you need to know to print Iain Lovecraft support-free terrain with confidence, from your first slicer settings to your finished painted building.
FDM (Fused Deposition Modelling) printing lays down melted filament layer by layer to build a model from the ground up. It is the most affordable and accessible form of 3D printing, and with the right models it produces terrain that looks spectacular on the tabletop. The key word is the right models — and that is precisely where Iain Lovecraft terrain stands apart.
Iain Lovecraft was among the first designers in the world to produce fully support-free FDM terrain — achieving it not by simplifying the models, but through clever geometric redesign: angling overhangs, splitting components at precisely calculated break-points, and reworking architectural features so that every surface falls within printable limits. The result is highly detailed, complex terrain that drops straight onto your print bed and comes out clean — no support scaffolding to cut away, no scarring, no wasted filament.
What Is Support-Free Design and Why Does It Matter?
Most FDM printers struggle with overhangs — surfaces that extend outward at more than 30–45° from vertical without anything below to support them. Traditional terrain models solve this by generating a scaffolding of support material underneath those areas. Supports work, but they come with real costs: extra filament, longer print times, fiddly removal, and surface marks where the supports touched the model.
Support-free design eliminates those costs entirely. By engineering the geometry of the model — chamfering window lintels, splitting roofs into printable halves, curving archways so they bridge rather than overhang, angling thatched eaves to fall within the magic 45° window — a skilled designer can produce models of extraordinary complexity that print cleanly on even the most basic FDM machine.
This is the design philosophy that Iain Lovecraft pioneered and has refined across every collection. A medieval inn, a Viking longhouse, a Venetian canal building — each is engineered from the ground up to print without a single support structure, on any FDM printer, in any common filament.
The goal was never to make simpler terrain. It was to make the most detailed terrain possible — and then engineer the geometry until it could print without supports on any machine a hobbyist is likely to own.
Choosing Your Filament
For terrain, PLA is the ideal choice and what all Iain Lovecraft models are optimised for. It is affordable, easy to print, available in every colour, and holds fine surface detail well. PETG is a good second option if you need more heat resistance — for models displayed near windows, for example. Avoid flexible filaments for terrain; they will not hold the crisp edges that make these models look their best.
Recommended filament colours for priming
Grey PLA is the most versatile base for painting — it accepts washes and drybrushing exactly as a primer coat would. Black PLA works well for stone structures where you plan to drybrush lighter tones. White PLA makes colour vibrancy pop if you are going for a bright, painted finish. In practice, since you will be painting the terrain, the filament colour matters less than consistency — pick one colour and stick to it for a batch so your painting starts from the same baseline.
Slicer Settings: The Definitive Starting Point
The settings below are tested starting points for printing Iain Lovecraft terrain on common FDM machines. They work with PrusaSlicer, Bambu Studio, Cura, and OrcaSlicer. Fine-tune from these baselines for your specific printer and filament brand.
| Setting | Recommended Value | Notes |
|---|---|---|
| Layer Height | 0.2 mm | Best balance of detail and speed. Use 0.15 mm for show pieces. |
| Nozzle Diameter | 0.4 mm | Standard. A 0.6 mm nozzle speeds up large pieces with minimal detail loss. |
| Print Speed | 40–60 mm/s | Slower speeds improve wall adhesion and surface quality on textured terrain. |
| Infill | 10–15% | Terrain is mostly hollow — low infill saves filament without losing rigidity. |
| Infill Pattern | Grid or Gyroid | Both print fast and add structural strength to walls. |
| Wall Loops / Perimeters | 3–4 | More perimeters = stronger, more detailed exterior surfaces. |
| Supports | NONE | This is the whole point — all Iain Lovecraft terrain is designed to print support-free. |
| Print Temperature (PLA) | 200–215 °C | Check your filament brand’s recommendation. Slightly higher helps bridging. |
| Bed Temperature (PLA) | 55–60 °C | A PEI spring steel sheet provides excellent adhesion without glue. |
| Cooling Fan | 100% after layer 3 | Essential for clean bridging — the core of support-free overhangs. |
| First Layer Height | 0.25–0.3 mm | A slightly squished first layer ensures good bed adhesion on flat bases. |
| Seam Position | Aligned / Rear | Hides layer seams at the back of buildings where they won’t be seen on the table. |
The Geometry Behind the Magic: How Iain Lovecraft Makes It Work
Understanding why the models print without supports helps you trust the process — and helps you orient parts correctly in your slicer when a model comes in multiple pieces.
The 45° rule
FDM printers can bridge a gap or print an overhang cleanly if it extends no more than 45° from vertical. Beyond that angle, the extruded filament has nothing to land on and begins to droop. Iain Lovecraft’s models are engineered so that every overhang — every window ledge, roof eave, door lintel, and decorative moulding — falls at or within this threshold. What looks like a complex overhanging detail on the finished model is, in cross-section, a carefully calculated chamfer or curve.
Strategic part splitting
Complex architectural elements — steeply pitched roofs, arched doorways, multi-storey facades — are split into sub-components at exactly the right point so that each piece can be printed flat-side down with no overhangs. The joints between pieces are designed to be invisible once glued and painted. This is a fundamentally different approach to splitting models purely for build volume: every split is a design decision driven by printability.
Bridging and vaulting
Archways and vaulted openings — features that appear impossible to print without supports — work because FDM printers can bridge horizontally across a gap almost indefinitely if the span is supported at both ends and the cooling fan runs at full speed. Iain Lovecraft’s archways are shaped and sized to land within reliable bridging distances for standard nozzle diameters, turning what looks like a support nightmare into a clean single-pass bridge.
Step-by-Step: From File to Table
1 — Download and unzip your STL files
All Iain Lovecraft terrain comes as a ZIP archive containing individual STL files — one per component. Open the archive and place the files in a dedicated folder for the collection.
2 — Import into your slicer
Open your slicer (Bambu Studio, PrusaSlicer, Cura, or OrcaSlicer) and drag the STL files in. Most pieces are pre-oriented for optimal printing — if a part looks unusual, check the product page or the included readme for orientation notes.
3 — Apply the settings above — and turn supports OFF
This is the step most new users hesitate on. The slicer’s support preview may flag some areas in yellow or red — ignore it. The models are engineered to print those areas cleanly. Disable supports entirely and slice the file.
4 — Check the layer preview
Scrub through the layer preview in your slicer before sending to the printer. Look for bridges — they will appear as horizontal spans with no material below. These are intentional and will print cleanly with a good cooling fan. If you see a layer that looks completely unsupported and non-horizontal, double-check the part orientation.
5 — Print, clean, and assemble
Once printed, pieces need no support removal — just peel them off the build plate. Light sanding with 400-grit paper on any visible layer lines is optional but recommended for display pieces. Assemble multi-part models with standard plastic model glue or superglue.
6 — Prime and paint
A spray coat of grey primer is the fastest way to unify all the printed parts and give paint something to grip. From there, the rich texture detail on Iain Lovecraft terrain — stone courses, timber grain, tile work — responds beautifully to basecoat-wash-drybrush techniques. You do not need to be an expert painter; the geometry does the work.
Six Tips for Perfect Prints Every Time
A perfectly level bed is more important than any slicer setting. An unlevel bed causes the first layer to delaminate, pulling the whole print off mid-build. Take ten minutes to re-calibrate before every new filament roll.
Support-free overhangs and bridges depend entirely on the extruded filament cooling and solidifying before the next layer lands on it. Run your part cooling fan at 100% from layer 3 onwards — this single setting makes or breaks bridge quality.
The fine surface texture on Iain Lovecraft terrain — cobblestone bases, carved stone, timber framing — prints best at 40–50 mm/s. Higher speeds smear the detail. If you are in a hurry, speed up infill but keep perimeter speed low.
More perimeter loops mean the textured exterior surfaces are fully captured and structurally solid. With only 1–2 perimeters, fine raised detail can appear weak or underfilled. Three is the minimum; four is ideal for show pieces.
Iain Lovecraft STL files are pre-oriented for optimal FDM printing. Resist the urge to rotate parts — a piece that looks awkward in the slicer is often already in its ideal print orientation. Check the product notes if in doubt.
Terrain collections are designed to work together. Arrange multiple smaller components on the same print plate — scatter pieces like barrels, crates, and fences fill your build volume efficiently and give you a whole scene in one run.
Start With These Collections
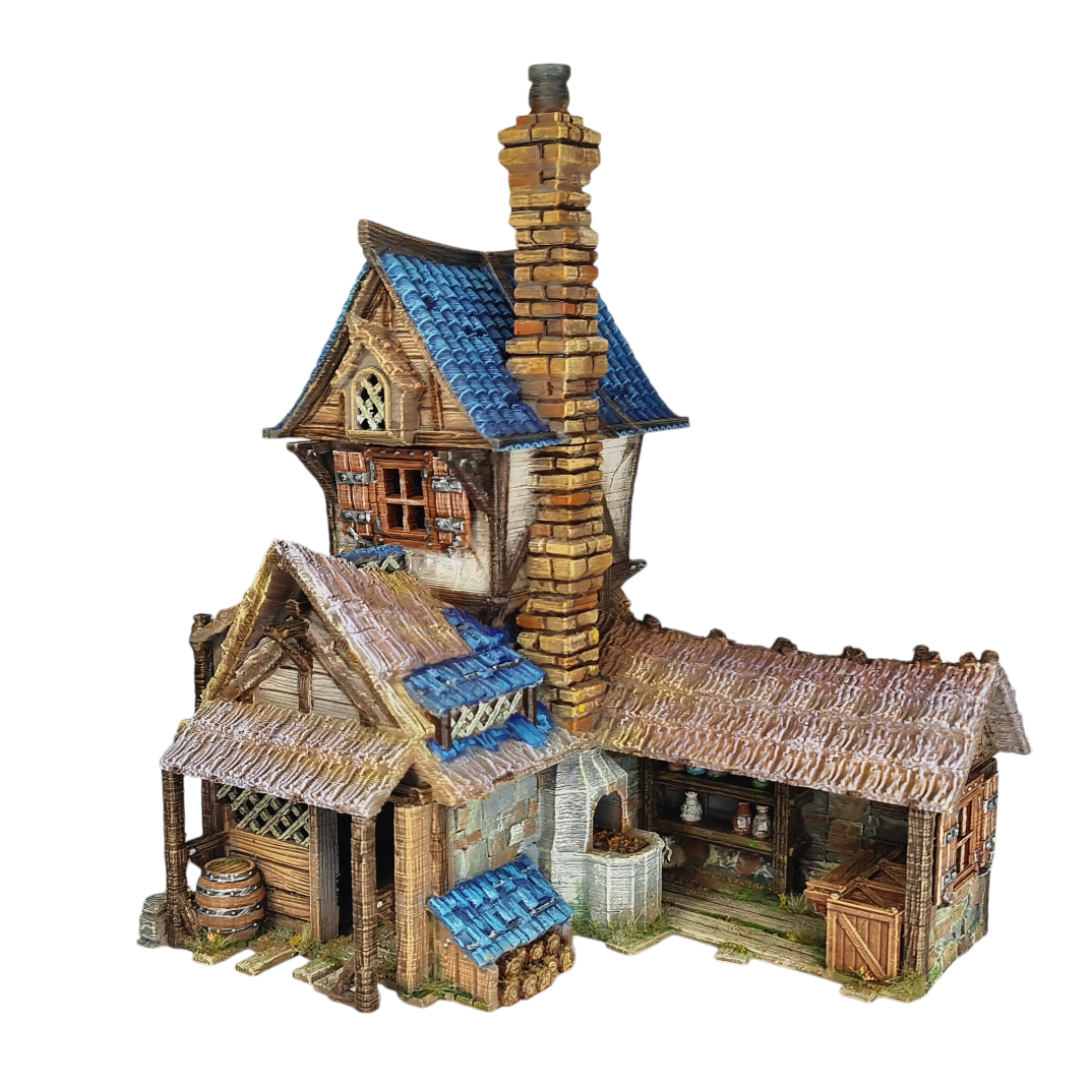
The Blacksmith’s Forge
If you are printing your very first piece of support-free terrain, this is where to begin. The Blacksmith is a magnificent multi-level forge — timber framing, striking blue roof tiles, and an attached working waterwheel — engineered to print cleanly on any FDM machine with no supports at all. It showcases every technique covered in this guide: chamfered overhangs, strategic part splits, and clean bridging. Print it, paint it, and see exactly what support-free design can achieve on your own desktop printer.
Each collection below is fully support-free and ready to print on any standard FDM machine. They span historical periods and fantasy settings — so whether your table is a Viking settlement, a medieval market town, a Venetian waterfront, or a pirate cove, there is a collection engineered and ready for your printer.
Every product in the Iain Lovecraft store is designed with the same support-free philosophy. Whether you are printing your first piece of terrain or building an entire campaign board, you will find that clean prints, rich detail, and zero support waste are the standard — not the exception.
If you have questions about printing a specific model, our community on Facebook and Discord is one of the most active and welcoming in the hobby. Share your prints, ask for tips, and see what other makers are building with the same files.